|
|
|
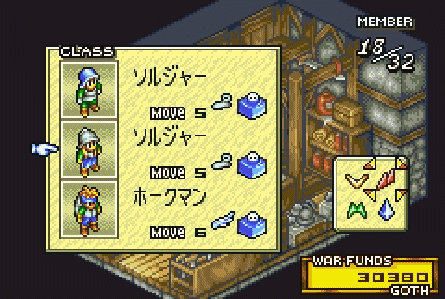
| Secrets IV. Fortune Teller Q's and A's X. Glycinia Locations 1. When attacking enemies, try to single out targets. A good idea is to single out enemies that are isolated or are weak. By singling units out, you will take less damage and be able to manager your troops more efficiently. 2. Spears and whips can be used for various purposes. Spears and whips can be used from a distance to prevent a counterattack. But remember when a spear or whip is used from a distance, it will only do half the damage that an attack standing next to someone would do. Giving spears and whips to other units beside beast tamers or valkyries is not a bad idea. My main character, who is a swordmaster, uses the special black spear. There is a difference between spears and whips. Spears can go through two characters standing next to each other; whereas, whips can only hit one character. A little trick I like to do is have an enemy in between any two characters with spears and attack with one. The other spear user will counterattack back through the enemy for extra damage. 3. Check class compatibility and enemy health when persuading. You will greatly increase your persuasion success rate if you know which classes to use. For example, swordmasters persuade archers and ninjas with ease. Although male and female versions of the same class persuade equally well, the female only classes have a wider range of compatibility. If you have no compatible classes available then at least use someone with the Arbitration emblem. Weakening down the target is a must but you do not need to get someone down to an inch of life just to persuade them. Getting the target under a third of health is plenty. Feel free to suspend the game before persuading so that you can go back if you fail. For a complete persuasion table visit the classes section. 4. Mobility is key. When characters are equipped with accessories that allows them to fly or warp they are immune to obstacles and height. They are able to travel unrestricted over any terrain. Those equipped with warp items are very efficient at killing hard to reach or weak enemies (sirens, gremlins). Warp items are best given to melee characters such as swordmasters, knights, or dragoons since they cannot effectively fight without sufficient mobility. 5. In castle battles, remember that your forces will be split up. When you fight at any castle (Ostorea and Angel's Headstone), your units will have to split up to fight each side. They CANNOT be used to fight on both sides. This has been changed from the original Tactics Ogre where you only had to fight one of them. Try to make each squad balanced or suitable to the battle environment. When both sides are completed, the two forces will join back together for the battle inside the castle. One trick is that if you can send your entire army of 8 or less characters down one path you will skip the other. This is not advisable because you have to keep a small army and will miss a few special items and spells at Ostorea. Remember that you can always go to a stage and view it and then reset your GBA. 6. Beating Shaher in his final form can be tough.
Shaher does some pretty potent attacks on you in his final form. There are some
tricks that will make the battle a lot easier than it may seem at first. Try to
keep your characters above 120 HP no matter what. Anytime someone slips under
150 or so, heal them immediately. Another good idea is to have 2 main attackers.
I like one person using Clotho with the sacred spear and another person using
the Anbicion's special ability (NOTE: You can equip the Anbicion to someone
during the edit screen right after beating Shaher's first form). Try having
someone stand next to each of them and protect them. REMEMBER THAT SHAHER'S
SLASH ONLY HITS THE SPACES NEXT TO HIM, NOT TWO SPACES AWAY. The best tactic to
beat Shaher is to kill 2 of his minions each turn. This will cause him to use
DECENT EVERY TURN so you will never take damage. Try having around 2-4 people
attacking the minions each turn. Summons work well on them. Most of all, keep
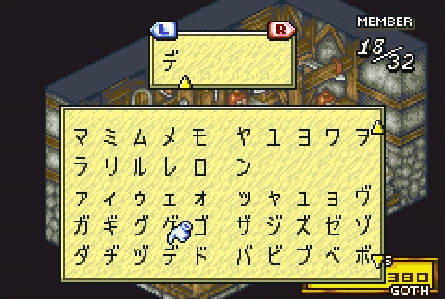
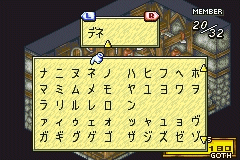
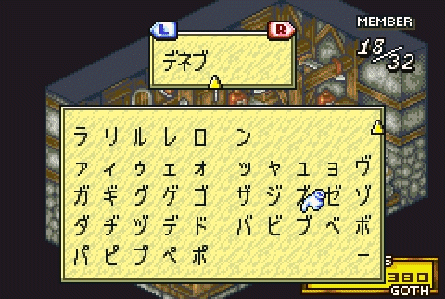
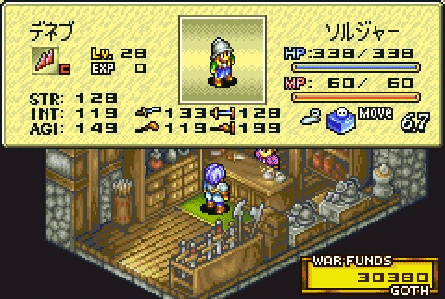
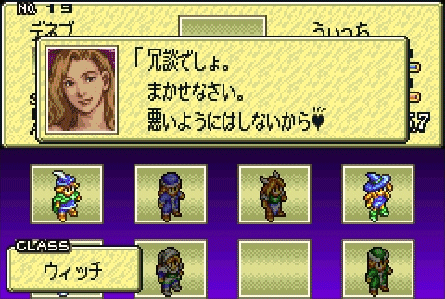
Alphonse alive at all costs! MUSIC.ON Allows music test. Enter it as a name of the main character or a recruited character. Once the game is beaten, more music is unlocked. (Only on English version) DEL.DATA Deletes all saved data. Enter it as a name of the main character or a hired character. (Only on English version) English codes discovered by one2treefor5 MUSIC_ON Allows music test. Enter it as a name of the main character or a hired character. Once the game is beaten, more music is unlocked. (Only on Japanese version) DEL_DATA Deletes all saved data. Enter it as a name of the main character or a hired character. (Only on Japanese version) * The Deneb code for the English version* Recruit a female soldier with either N or C alignment and name her Deneb. The element does not matter. Leveling up as a wizard or cleric is recommended. Give her the Vixen's Whisper emblem by having her persuade a male character. Remember, use like classes so if you want to persuade a soldier make her a soldier or a knight. Once she has 38 MP and 35 intelligence she will be able to become a witch. Just change her to a witch and she will transform. Deneb can use witch and summon magic with the additions of Faith, Tranquillize, and Cursed Existence. Her charm ability is excellent. Get her at the lowest level you can to take advantage of her high stat growth. Now that you have her the secret shop at Scabellum will open up. Refer to that section for information on the shop. If you should dismiss, snap, kill, trade, or otherwise lose Deneb you can get her back by making another witch named Deneb. * The Deneb code for the Japanese version* The code is identical to the English version except for what you name her. Because the vast majority of those visiting this site cannot understand Japanese (myself included) the steps have been outlined one by one so that the code is done correctly. Step 1. Recruit a female character and give her any element.
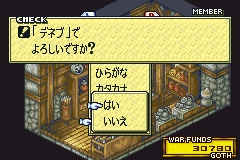
Step 2. Use the 2nd name choice (katakana) and insert the name using the exact 3 signs below.
Step 4. Take the character into a battle and persuade a male enemy (I suggest a soldier).
Step 5. After acquiring the charm emblem, change the character to a witch (note: the character still needs to reach the stat requirements).
Treasure Chart
Buried Treasure Locations
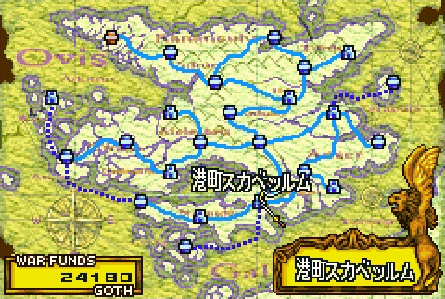
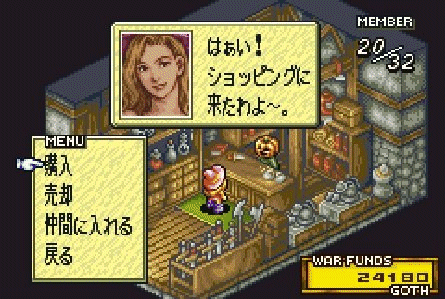
6 - 4 points Troops: Ninja, Archer, 2 Soldiers 3 - 1 points Troops: Wizard, Archer, 2 Soldiers 0 - -3 points Troops: Cleric, Ninja, 2 Soldiers -4 - -6 points Troops: Wizard, Cleric, 2 Soldiers Once Deneb joins, take her to Scabellum. It is the first town on the bottom of the map. Enter the shop and you can buy very special items, including the firecrest. Once you have Deneb the shop will remain open even if you should lose her later on.
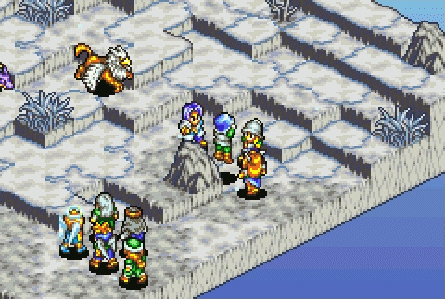
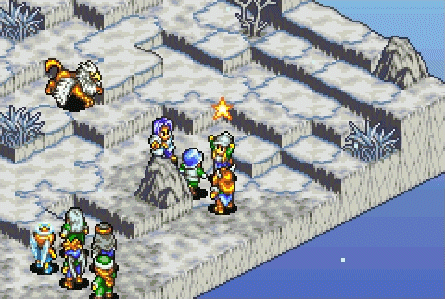
Firecrest Sell 5 glass pumpkins in the secret shop and the firecrest will become available to purchase for 32,000 goth. The glass pumpkins do not all have to be sold in the same visit. There is no limit to the amount of firecrests you can buy but it is the most expensive item in the game. Ring of the Dead 1. One is in the crypt of the castle where you fight Naris or Rictor depending on which route you take. It is in the corner next to the broken coffin. 2. Kill a daemon in the snowy battle against the twin wizards. The daemon will drop it. 3. Say choice B when Saia asks you what you fight for. (Thanks Winter) Snapdragon (turns characters into swords) 1. In Sotavento: Push UP
on the control pad X times, and then LEFT on the pad Y times 2. In Belleza: It's on (0,11) at the plain in the top left corner. You need to burn the ground first. 3. Kill a giant in the snowy battle against the twins. 4. In the special battle with Saia, one dragon drops it (Thanks Waspinator9063) Zephyrus Go to Rana either right before Ostorea in Chapter 2 or anytime in Chapter 3. Orb / Circlet of Wisdom After the battles in Ostorea Castle, head to Solea for a scene with Eleanor.
She will speak about wanting to stay with Alphonse which will prompt two
choices. VII. Endings Ending A+: Chose choice A in Cape Urodela and include Eleanor in your party when you fight the final boss. Beat the game in under 25 hours, have Alphonse get at least 50 kills, and do not let more than 10 people die as well. Ending A: Chose choice A in Cape Urodela and include Eleanor in your party when you fight the final boss. Ending B: Chose choice B in Cape Urodela and include Eleanor in your party when you fight the final boss. Ending C: Chose choice A or B in Cape Urodela and DO NOT include Eleanor in your party when you fight the final boss. Ending D: Kill Eleanor before you beat the final boss. Game Over Ending: Lose when you fight the final boss. ***********SPOILERS***************** Click on a link to open a text file with
the corresponding A+ Ending (Contributed by Lans Hamilton) A Route Ending (Contributed by Waspinator 9063) B Route Ending (Contributed by Mr. Beardsly) Game Over Ending (Contributed by Mr. Beardsly) For frame by frame footage of all the endings and variations click here. The images are from The Video Game Museum.
Enchanted Hunting Wares: X. Glycinia Locations Location 1: Vespa before Formido Fortress in Chapter 1 Location 2A: Bison (Route A) before Arena in
Chapter 1 Location 2B: Sufrir (Route B) before Arena in Chapter 1 Location 3: Aquila Volcano before Vespa in Chapter 2 Location 4: Vespa before Haena in Chapter 2 Location 5: Haena before Ostorea Castle in Chapter 2 Location 6: Lutra before Angel's Headstone
| |||||||||||||||||||||||||||||||||||||||||||||||||||||||||||||||||||||||